How Long Does a Tankless Water Heater Last Compared to Traditional Models?

Tools laid out while installing heater

When choosing a water heating system for your home in the Minneapolis-St. Paul area, one of the most common questions homeowners ask is: how long does a tankless water heater last compared to traditional models? Understanding the lifespan differences between these two popular types of water heaters is crucial for making an informed decision that balances cost, efficiency, and long-term reliability.

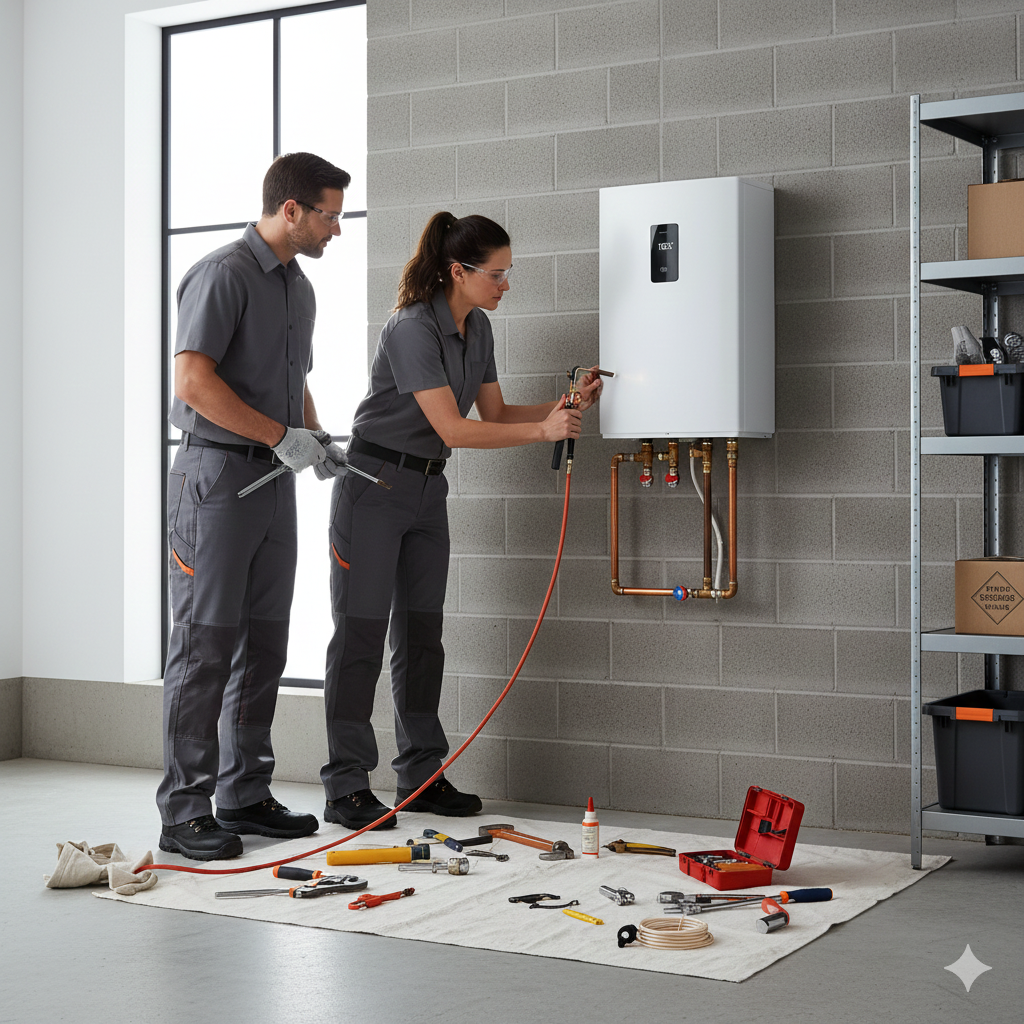
At Bedrock Plumbing & Drain Cleaning, we have extensive firsthand experience installing and maintaining both tankless and traditional water heaters. Our expert technicians have serviced homes across neighborhoods like St. Louis Park, near Theodore Wirth Park, and along major corridors such as Highway 100. This local expertise allows us to provide tailored advice grounded in real-world performance and regional conditions.

Typical Lifespan of Traditional Water Heaters

Traditional water heaters, which store hot water in a tank, typically last between 8 to 15 years according to industry standards and our practical experience at Bedrock Plumbing. This lifespan varies based on factors such as water quality, maintenance frequency, and the heater’s build quality. Sediment buildup inside the tank due to hard water is a common culprit that can significantly reduce the heater’s efficiency and longevity.

For example, in homes near the Chain of Lakes or areas with high mineral content in water, tanks may need more frequent flushing to prevent sediment accumulation. Without routine maintenance, the tank’s metal components can corrode prematurely, leading to leaks or failure.

Replacement costs for traditional tank water heaters generally range from $1,000 to $2,500, including installation, as noted by Bedrock Plumbing’s service pricing. Installation usually takes about 2 to 4 hours, depending on the complexity and whether it is a direct replacement or an upgrade.

Longevity of Tankless Water Heaters

Tankless water heaters, also known as on-demand water heaters, do not store hot water but heat it as it flows through the unit. This design allows them to last significantly longer, with an average lifespan of about 20 years or more when properly maintained.

According to Bedrock Plumbing’s expertise, tankless models benefit from fewer corrosion issues since they don’t have a storage tank subject to sediment buildup. This advantage is particularly valuable in areas like the Minneapolis suburbs, where water hardness can be an issue.

Tankless water heaters typically come with a higher upfront cost, ranging from $2,000 to $4,000+ including installation. However, their energy efficiency and longer lifespan can result in cost savings over time. Our technicians recommend regular descaling and maintenance to ensure peak performance and durability.

Comparing Both Models: Lifespan and Efficiency

Feature Traditional Tank Water Heater Tankless Water Heater
Average Lifespan 8 to 15 years 20+ years
Energy Efficiency Lower due to standby heat loss Higher, heats on demand
Initial Cost $1,000 – $2,500 (installed) $2,000 – $4,000+ (installed)
Maintenance Needs Regular flushing to remove sediment Periodic descaling and filter cleaning
Space Requirements Requires tank storage space Compact, wall-mounted

Real-World Examples from Bedrock Plumbing

At Bedrock Plumbing & Drain Cleaning, we have replaced many traditional water heaters with tankless models in neighborhoods like St. Louis Park and nearby Maple Grove. For instance, a recent project involved upgrading a home near Theodore Wirth Park from a 12-year-old conventional tank unit to a modern tankless system. The homeowner reported enjoying endless hot water with improved energy bills and more space freed up in their utility closet.

Our technicians also handle emergency repairs and replacements swiftly, minimizing downtime. Whether it’s a sudden water heater failure on a cold Minneapolis winter day or a planned upgrade, our team ensures the installation meets local codes and manufacturer specifications.

Why Choose Bedrock Plumbing & Drain Cleaning for Your Water Heater Needs?

Bedrock Plumbing is a trusted plumbing partner with years of experience in the Twin Cities metro area. Our licensed plumbers specialize in both tankless and traditional systems, providing expert installation, repair, and maintenance services. We prioritize transparency, quality, and customer satisfaction, with many clients across neighborhoods such as St. Louis Park and near the Minnehaha Creek enjoying our dependable service.

We offer fast, reliable service including emergency repairs available seven days a week, often responding the same day to water heater issues. Our team helps homeowners select the right water heater model based on household size, energy efficiency goals, and budget.

Explore our full range of services, including expert tankless water heater replacement and installation to upgrade your home’s comfort and efficiency.

Maintenance Tips to Extend Your Water Heater’s Lifespan

  • Regular Flushing: For traditional tanks, flush annually to remove sediment.
  • Descaling: For tankless units, especially in hard water areas, descale every 1-2 years.
  • Check Anode Rod: Replace the anode rod in tank models to prevent corrosion.
  • Inspect Venting: Ensure proper venting for safety and efficiency.
  • Schedule Professional Maintenance: Bedrock’s licensed plumbers recommend yearly inspections to catch issues early.

Frequently Asked Questions

How long does a tankless water heater typically last?

Tankless water heaters generally last about 20 years or more with proper maintenance. Their design avoids sediment buildup and corrosion issues common in tank models, contributing to their longevity. Regular descaling and filter cleaning help maintain optimal performance and extend lifespan.

What is the average lifespan of a traditional tank water heater?

Traditional tank water heaters typically last between 8 to 15 years. Factors like water hardness, sediment buildup, and maintenance frequency greatly influence their longevity. Without proper care, tanks may corrode or leak prematurely.

Are tankless water heaters more energy-efficient than traditional ones?

Yes, tankless water heaters are more energy-efficient because they heat water only on demand, eliminating standby heat loss associated with traditional tanks. This efficiency can lead to lower energy bills over time, especially in households with variable hot water usage.

What maintenance is required for tankless water heaters?

Blog Image 1

Tankless water heaters require periodic descaling to remove mineral deposits, especially in areas with hard water like Minneapolis suburbs. Cleaning filters and inspecting the unit annually ensures efficient operation and prevents costly repairs.

How much does it cost to replace a water heater?

Replacing a traditional tank water heater typically costs between $1,000 and $2,500 including installation. Tankless models range from $2,000 to $4,000 or more due to higher equipment and installation complexity. Bedrock Plumbing provides transparent pricing and expert installation to maximize value.

How long does water heater installation take?

Installation usually takes between 2 to 4 hours depending on whether it is a standard replacement or an upgrade to a different system like tankless. Our licensed plumbers at Bedrock Plumbing ensure safe, code-compliant installations with minimal disruption.

Why might I choose a tankless water heater over a traditional model?

Tankless water heaters provide endless hot water, take up less space, and offer improved energy efficiency. They also have a longer lifespan, making them a smart investment for homeowners seeking reliability and lower utility bills.

Can Bedrock Plumbing help with emergency water heater repairs?

Yes, Bedrock Plumbing offers 24/7 emergency water heater repair services. Our skilled technicians respond promptly to diagnose and fix issues, ensuring your hot water is restored quickly, even during holidays or weekends.

Do I need a permit for water heater replacement in Minnesota?

Yes, most cities in Minnesota require a permit for water heater replacement. Bedrock Plumbing’s licensed professionals handle all necessary permits and inspections, ensuring your installation meets local codes and safety standards.

How do I know if my water heater needs replacing?

Signs your water heater may need replacement include inconsistent water temperatures, leaks, strange noises, or failure to produce hot water. An older unit nearing or exceeding its typical lifespan is also a candidate for replacement to avoid unexpected breakdowns.

Conclusion

Choosing between a traditional tank water heater and a tankless system depends on your household needs, budget, and long-term goals. While traditional water heaters offer lower upfront costs, their 8 to 15-year lifespan and higher energy use may lead to more frequent replacements and higher bills.

Tankless water heaters, with their 20+ year lifespan, higher efficiency, and space-saving design, provide a compelling alternative. At Bedrock Plumbing & Drain Cleaning, we bring expert guidance, professional installation, and reliable maintenance services to homes across the Minneapolis-St. Paul metro area, including neighborhoods like St. Louis Park and areas near Theodore Wirth Park.

For a trusted partner in your water heater replacement journey, visit our specialized tankless water heater replacement page or explore our home page to learn more about our full range of plumbing solutions.

Comprehensive Maintenance Guide for Tankless Water Heater Replacement

Water heater sample

Tankless water heaters have revolutionized home hot water systems by providing energy-efficient, on-demand heating that saves space and utility costs. However, to maximize their lifespan and ensure optimal performance after a replacement, proper maintenance is essential. Whether you’re in the vibrant neighborhoods around Minneapolis–Saint Paul or near natural landmarks like Lake Harriet or Minnehaha Park, understanding the required upkeep of your new tankless water heater will protect your investment and keep your household running smoothly.

Bedrock Plumbing & Drain Cleaning, a trusted local expert in Minnesota, specializes in tankless water heater replacement and maintenance services that emphasize reliability, efficiency, and safety. This comprehensive guide draws on their expertise and real-world experience to provide you with actionable steps and insights for maintaining your tankless water heater after replacement.

Understanding the Importance of Maintenance for Tankless Water Heaters

Tankless water heaters are designed to last longer than traditional tank models—typically over 20 years with proper care. Nonetheless, they require routine maintenance to prevent issues like sediment buildup, mineral scaling, and system inefficiencies that can compromise performance and shorten their lifespan. According to Bedrock Plumbing, regular maintenance can significantly reduce the risk of costly repairs and unexpected system failures while optimizing energy use and water temperature consistency.

Key Maintenance Tasks After Tankless Water Heater Replacement

After installing a new tankless water heater, the following maintenance steps are critical to preserve your unit’s efficiency and longevity:

1. Annual Flushing and Descaling

Mineral deposits, especially calcium and lime, accumulate in the heat exchanger and water lines over time, particularly in Minnesota’s hard water areas. Bedrock Plumbing recommends performing an annual flush using a descaling solution such as white vinegar to dissolve these deposits. This process involves shutting off the water and gas supply, connecting hoses to the maintenance valves, and circulating the vinegar through the system with a small pump. This prevents clogging and maintains optimal heat transfer efficiency.

2. Cleaning the Water Inlet Filter

The water inlet filter traps debris and sediment that can damage the water heater. It should be inspected and cleaned every few months or more frequently if you notice reduced water pressure. Bedrock Plumbing technicians advise removing the filter, rinsing it thoroughly, and reinstalling it to ensure unobstructed water flow.

3. Checking and Replacing the Anode Rod

Some tankless models have an anode rod to prevent corrosion in the heat exchanger. Inspecting the anode rod annually and replacing it as needed helps extend the lifespan of your unit by protecting against rust and deterioration.

4. Inspecting Venting and Exhaust Systems

Proper venting is critical to safe operation. After replacement, verify that vent pipes are clear of obstructions, securely connected, and compliant with local codes. Bedrock Plumbing highlights that faulty venting can cause dangerous gas buildup and reduce system efficiency.

5. Monitoring for Leaks and Unusual Noises

Regularly inspect around your water heater for leaks, drips, or unusual sounds such as banging or hissing. These can signal internal issues like pressure fluctuations or valve malfunctions that require prompt professional attention.

6. Professional Annual Inspections

Scheduling an annual professional inspection ensures that any emerging issues are caught early. Certified technicians from Bedrock Plumbing perform thorough diagnostics, safety checks, and maintenance to keep your system running reliably.

Local Expertise and Experience from Bedrock Plumbing & Drain Cleaning

Bedrock Plumbing & Drain Cleaning brings deep expertise to tankless water heater replacement and maintenance in Minneapolis and surrounding areas, including neighborhoods near the University of Minnesota and close to major intersections like I-35W and Highway 62. Their licensed plumbers understand Minnesota’s water conditions and local regulations, ensuring your system meets all safety and performance standards.

With over a decade of experience, Bedrock Plumbing has documented numerous successful tankless water heater replacements, emphasizing customer satisfaction, code compliance, and energy efficiency. Their team uses industry-leading tools and follows manufacturer guidelines meticulously to ensure every installation and maintenance task is done right the first time.

Why Choose Professional Maintenance Services?

While some basic upkeep can be DIY-friendly, Bedrock Plumbing advises that professional maintenance is crucial for safety, warranty preservation, and technical accuracy. Improper handling of gas lines, electrical connections, or venting can pose serious risks. Professionals also identify subtle signs of wear or malfunction that homeowners may overlook.

In addition, professional services include:

  • Proper flushing and descaling using commercial-grade equipment
  • Accurate diagnostics with specialized tools
  • Code-compliant repairs and replacements
  • Advice on energy-saving settings and usage habits

For trusted tankless water heater replacement and maintenance solutions in the Twin Cities metro area, consider contacting Reliable Tankless Water Heater Replacement and Maintenance Services in Minneapolis-Saint Paul. Their customer-focused approach ensures rapid, efficient service tailored to your home’s unique needs.

Maintenance Tips Specific to Minnesota’s Water and Climate Conditions

Given Minnesota’s notoriously hard water and cold winters, homeowners should pay special attention to:

  • Using water softening systems or conditioners to reduce mineral buildup
  • Insulating pipes connected to the water heater to prevent freezing during harsh winters
  • Checking pressure relief valves regularly to prevent damage from freezing expansion
  • Scheduling maintenance before winter to ensure the system is winter-ready

Bedrock Plumbing technicians customize maintenance plans to address these local environmental factors, helping your tankless water heater perform optimally year-round.

Common Maintenance Challenges and How to Avoid Them

Some frequent challenges with tankless water heaters include:

  • Mineral scaling: Ignoring annual flushing leads to clogged heat exchangers and reduced efficiency.
  • Filter blockages: Neglecting the inlet filter causes low water flow and potential system damage.
  • Ventilation issues: Improper vent installation or debris buildup can cause carbon monoxide risks and system shutdowns.
  • Leaks: Undetected leaks can cause water damage and costly repairs.

Regular professional inspections and adherence to maintenance schedules recommended by Bedrock Plumbing drastically reduce these risks.

How to Prepare Your Home for Tankless Water Heater Maintenance

Before scheduling maintenance or replacement, ensure you:

  • Clear the area around the water heater for technician access
  • Turn off water and power or gas supply as instructed
  • Have any warranty and installation documentation available
  • Note any performance issues or unusual symptoms to report

Being prepared helps expedite service and ensures thorough maintenance.

Cost Considerations for Maintenance and Replacement

According to Bedrock Plumbing, typical repair costs for water heaters range from $150 to $600, while replacing a standard tank water heater costs between $1,000 and $2,500. Tankless water heater replacements generally range from $2,000 to $4,000+ including installation. Investing in regular maintenance can prevent expensive replacements and extend your unit’s life well beyond 20 years.

Conclusion: Maintaining Your Tankless Water Heater for Long-Term Efficiency

Blog Image 1

Proper maintenance after tankless water heater replacement is vital to ensure consistent hot water supply, energy efficiency, and system longevity. By following the expert guidance and maintenance protocols from Bedrock Plumbing & Drain Cleaning—your local Minneapolis-Saint Paul plumbing authority—you protect your home investment and enjoy worry-free comfort year-round.

For more detailed information or to schedule professional tankless water heater replacement and maintenance, visit Bedrock Plumbing & Drain Cleaning Official Homepage for Trusted Minneapolis Plumbing Services. Their team is ready to provide expert support tailored to your home’s needs.

Frequently Asked Questions

What is the most important maintenance task for a tankless water heater?

The most crucial maintenance task is the annual flushing and descaling of the heat exchanger to remove mineral deposits, particularly calcium buildup common in hard water areas like Minneapolis. This prevents clogging, improves efficiency, and extends the life of the unit. Professional flushing involves circulating a vinegar solution or commercial descaler through the system using specialized equipment, which Bedrock Plumbing recommends for best results.

How often should I have my tankless water heater serviced?

It is recommended to have your tankless water heater professionally serviced at least once a year. Annual inspections and maintenance help identify any issues early, maintain energy efficiency, and ensure safe operation. For households with very hard water or heavy usage, more frequent maintenance may be necessary to prevent sediment buildup and other complications.

Can I perform tankless water heater maintenance myself?

While some basic maintenance like cleaning the water inlet filter can be performed by homeowners, professional maintenance is strongly advised for tasks such as flushing, inspecting anode rods, and checking venting systems. Certified technicians from Bedrock Plumbing have the expertise and tools to safely and effectively perform these tasks, ensuring warranty compliance and system longevity.

Why is professional installation important for tankless water heaters?

Professional installation ensures your tankless water heater is set up according to manufacturer specifications and local codes, which is critical for safety, performance, and warranty validity. Licensed plumbers like those at Bedrock Plumbing handle complex gas, electrical, and venting connections correctly, preventing hazards such as gas leaks, carbon monoxide buildup, or inefficient operation.

What signs indicate my tankless water heater needs maintenance or replacement?

Common indicators include inconsistent hot water temperatures, reduced water pressure, unusual noises, water leaks around the unit, and frequent system malfunctions. Bedrock Plumbing advises scheduling an inspection promptly if you notice any of these symptoms to prevent more serious damage or sudden failure.

How does Minnesota’s water quality affect my tankless water heater maintenance?

Minnesota’s hard water, rich in minerals like calcium and magnesium, contributes to scale buildup inside the heat exchanger and pipes. This accelerates wear and reduces efficiency. Using water softening systems and adhering to a strict maintenance schedule with annual descaling are essential practices recommended by Bedrock Plumbing to combat these local water conditions.

Is it necessary to shut off utilities before maintenance?

Yes, shutting off the water supply and power or gas to your unit is a critical safety step before performing any maintenance or repairs. This prevents accidents and protects the system. Bedrock Plumbing technicians always follow this protocol during service calls.

How long does maintenance typically take for a tankless water heater?

Routine maintenance, including flushing, filter cleaning, and inspection, generally takes about 1 to 2 hours. More extensive repairs or replacements may require additional time. Scheduling regular maintenance with Bedrock Plumbing ensures efficient, timely service minimizing disruption to your household.

Can maintenance improve the energy efficiency of my tankless water heater?

Absolutely. Removing mineral deposits and ensuring all components function correctly helps the unit heat water more efficiently, reducing energy consumption and lowering utility bills. Bedrock Plumbing emphasizes that regular maintenance is one of the best ways to maximize the energy-saving benefits of your tankless water heater.

What should I do if I notice a leak around my tankless water heater?

If you notice any leaks, immediately turn off the water supply and contact a licensed professional like Bedrock Plumbing to inspect and repair the issue. Leaks can cause water damage, reduce system efficiency, and may indicate failing components that require prompt attention to avoid costly damage.

How Do I Prepare My Plumbing for a Winter Vacation?

Pipe freezing during winter

To prepare your plumbing for a winter vacation, you need to take several key steps to prevent freezing and potential water damage. Set your thermostat to a minimum of 55°F to maintain sufficient heat throughout your home. Shut off the main water supply and drain the system by opening all faucets. For toilets, flush them and add antifreeze to prevent any remaining water from freezing. Finally, arrange for someone to check your home every 2-3 days during your absence to ensure everything remains in good condition.

Why Proper Plumbing Preparation Matters for Winter Vacations

Winter vacations offer a wonderful escape from the cold, but leaving your home’s plumbing unprotected during freezing temperatures can lead to disaster. Frozen pipes can burst, causing thousands of dollars in water damage to your walls, floors, and personal belongings. Taking the time to properly prepare your plumbing system before departing can save you from returning to a flooded home and expensive emergency repairs.

The risks are particularly significant in the Pacific Northwest, where winter temperatures can fluctuate dramatically. At Bedrock Plumbing & Drain Cleaning, we’ve seen too many homeowners face extensive damage that could have been prevented with proper preparation. Let’s explore the essential steps to protect your home while you’re enjoying your winter getaway.

Essential Plumbing Preparation Steps

Maintain Adequate Home Temperature

While it might be tempting to turn your heating system off completely to save on energy costs during your absence, this is one of the most common mistakes homeowners make. Set your thermostat to a minimum of 55°F (13°C) to keep your pipes warm enough to prevent freezing.

For homes with zoned heating systems, ensure all areas containing plumbing are adequately heated. Don’t forget about spaces like basements, attics, and crawl spaces where pipes might be exposed to colder temperatures. Consider using a smart thermostat that allows you to monitor and adjust your home’s temperature remotely through a smartphone app.

Shut Off and Drain Your Water Supply

The most effective way to prevent frozen pipes is to eliminate the water that could freeze in the first place:

  1. Locate your home’s main water shut-off valve (typically near the water meter) and turn it off completely.
  2. After shutting off the water supply, open all faucets in your home to drain the remaining water from the pipes.
  3. Start with the highest floor and work your way down to allow gravity to assist in the draining process.
  4. Don’t forget exterior faucets and hose bibs, which are particularly vulnerable to freezing.

For extra protection, consider having a professional plumber install an emergency pressure release valve to protect against pipe bursting in case of freezing.

Address Toilets, Drains, and Appliances

Toilets and drains require special attention during winter vacation preparation:

  1. Flush all toilets to remove most of the water from the tanks and bowls.
  2. Add RV antifreeze (never use automotive antifreeze) to toilet bowls and tanks. Pour approximately 1/2 cup into the bowl and 1 cup into the tank.
  3. Pour a small amount of RV antifreeze down each drain in your home, including sinks, showers, tubs, and floor drains.
  4. For washing machines and dishwashers, turn off their individual water supply valves and run a short cycle to drain any remaining water in the lines.

Insulate Vulnerable Pipes

For added protection, especially in older homes with less insulation:

  1. Identify pipes in unheated or poorly heated areas of your home.
  2. Apply foam pipe insulation sleeves to these vulnerable pipes.
  3. Use heat tape or heating cables on particularly exposed pipes, following the manufacturer’s installation instructions.

Arrange for Home Checks

Even with all precautions taken, it’s crucial to have someone check on your home every 2-3 days:

  1. Ask a trusted friend, family member, or neighbor to visit regularly.
  2. Provide them with your contact information and the location of the main water shut-off valve in case of emergency.
  3. Have them check for any signs of water leaks, ensure the heating system is functioning properly, and verify there are no unusual odors or sounds.
  4. Consider hiring a professional home-watch service if you don’t have someone reliable to check your property.

What to Do Upon Your Return

When you return from vacation, carefully restore your plumbing system:

  1. Before turning the main water supply back on, close all faucets and fixtures.
  2. Slowly turn on the main water valve to avoid a sudden pressure surge.
  3. Open faucets one at a time, starting with the lowest level of your home and working upward.
  4. Check all visible pipes and connections for leaks or signs of damage.
  5. Flush toilets and run water through all drains to clear the antifreeze.

Need Professional Help with Your Winter Plumbing Preparation?

At Bedrock Plumbing & Drain Cleaning, we understand the importance of protecting your home during winter vacations. Our experienced technicians can help you prepare your plumbing system properly, ensuring peace of mind while you’re away. We offer comprehensive pre-vacation plumbing inspections and can provide personalized recommendations for your specific home.

Don’t risk coming back to a plumbing disaster. Contact Bedrock Plumbing & Drain Cleaning today to schedule your pre-vacation plumbing inspection or for expert advice on winterizing your home’s plumbing system. Enjoy your winter getaway knowing your home is properly protected!

How Do I Prevent My Pipes from Freezing During a Minnesota Winter?

Pipes frozen during winter

Preventing frozen pipes in Minnesota’s harsh winters requires proactive measures to protect your plumbing system. Insulate all exposed pipes in unheated areas like basements, crawl spaces, and garages, and seal gaps around rim joists and foundation cracks to prevent cold air infiltration. During extreme cold snaps, keep cabinet doors open to allow warm air circulation around pipes, let faucets drip slightly, and maintain your home’s temperature at a minimum of 55°F even when you’re away. Additionally, disconnect outdoor hoses before winter, drain exterior faucet lines, and consider adding extra insulation in older homes with inadequate protection.

Why Frozen Pipes Are a Serious Winter Threat in Minnesota

Minnesota winters bring brutally cold temperatures that put your home’s plumbing at significant risk. When water freezes inside pipes, it expands with tremendous force—enough to split metal and plastic pipes alike. A single burst pipe can release hundreds of gallons of water per hour, causing catastrophic damage to your home’s structure, electrical systems, and personal belongings.

At Bedrock Plumbing & Drain Cleaning, we respond to countless emergency calls each winter from homeowners facing the devastating consequences of frozen pipes. The good news? With proper preparation, these disasters are almost entirely preventable.

Essential Prevention Strategies for Minnesota Homeowners

Identify and Insulate Vulnerable Areas

The most freeze-prone pipes in your home are those in unheated or minimally heated spaces:

  • Exterior walls
  • Unheated basements and crawl spaces
  • Attics and roof spaces
  • Garages and outbuildings
  • Under kitchen and bathroom cabinets that share exterior walls

Pipe insulation is your first line of defense. Foam pipe sleeves are inexpensive, easy to install, and extremely effective. For added protection in extremely vulnerable areas, consider heat tape or heat cables that provide active warming. Remember to check that your insulation remains intact each fall before temperatures drop.

Seal Air Leaks and Improve Home Efficiency

Cold air infiltration is a major contributor to frozen pipes. Take time each fall to:

  • Seal gaps around rim joists where your home’s foundation meets the frame
  • Caulk cracks in your foundation
  • Weather-strip doors and windows
  • Insulate electrical outlets on exterior walls
  • Close and seal vents to crawl spaces

These measures not only protect your pipes but improve your home’s energy efficiency, potentially lowering your heating bills throughout Minnesota’s long winter season.

Maintain Adequate Heat Throughout Your Home

Even during the coldest nights, maintaining proper indoor temperature is crucial:

  • Keep your thermostat set no lower than 55°F, even when you’re away
  • For vacation homes or extended absences, consider a smart thermostat that alerts you to dangerous temperature drops
  • If you have rooms that tend to get colder than others, use a space heater (safely) or keep interior doors open to improve warm air circulation
  • During extreme cold snaps (-20°F or below), set your thermostat a few degrees higher than normal

Allow Warm Air to Reach Hidden Pipes

Pipes concealed in cabinets or behind walls need special attention:

  • Open kitchen and bathroom cabinet doors overnight during severe cold to allow heated air to circulate around supply lines
  • Remove items from cabinets that might prevent warm air from reaching pipes
  • For extreme situations, aim a fan to blow warm air toward vulnerable areas

Keep Water Moving During Extreme Cold

Moving water resists freezing much better than standing water:

  • Allow faucets connected to vulnerable pipes to drip slightly overnight when temperatures plummet below zero
  • Run cold water occasionally through rarely-used fixtures
  • This minimal water use costs far less than repairing burst pipes

Prepare Outdoor Plumbing Before Winter Arrives

Exterior plumbing is particularly vulnerable to Minnesota’s harsh conditions:

  • Disconnect and drain all garden hoses before the first freeze
  • Shut off water to exterior faucets using interior shut-off valves
  • Drain remaining water from outdoor faucet lines
  • Consider installing frost-free hose bibs for additional protection
  • Drain and winterize irrigation systems properly

Special Considerations for Older Minnesota Homes

Homes built before modern building codes may need additional attention:

  • Consider an energy audit to identify areas needing additional insulation
  • Look for pipes in exterior walls that may have been installed without proper clearance or insulation
  • Pay special attention to additions or renovations where pipe insulation may have been overlooked
  • Install pipe access panels in non-visible areas to allow warm air circulation

What To Do If You Suspect Frozen Pipes

If you turn on a faucet and only get a trickle of water during cold weather:

  1. Keep the faucet open as you treat the frozen section
  2. Apply heat using an electric heating pad, hair dryer, or portable space heater (never use open flame devices)
  3. Continue applying heat until full water pressure returns
  4. Check all other faucets to ensure no other pipes are frozen

Trust Bedrock Plumbing for Winter Pipe Protection

Don’t wait for an emergency to protect your home’s plumbing system. At Bedrock Plumbing & Drain Cleaning, we offer comprehensive winter plumbing inspections to identify and address potential freeze risks before they become costly emergencies.

Our licensed technicians can properly insulate vulnerable pipes, install freeze-protection devices, and ensure your plumbing system is ready for whatever Minnesota winter throws your way.

Contact Bedrock Plumbing today at (612) 555-1234 or visit bedrockplumbers.com to schedule your winter plumbing inspection. Protect your home and your peace of mind this winter season.

When Should I Winterize My Outdoor Faucets?

Frozen faucets

Winterize your outdoor faucets by mid-October, before the first hard freeze hits your area. Proper winterization involves disconnecting and draining all garden hoses, shutting off the interior shut-off valves that feed your exterior faucets, opening the outside faucets to drain any remaining water, and leaving them open throughout winter. This process is essential even for frost-free hose bibs, as it prevents costly pipe damage that can occur when trapped water freezes and expands.

Why Winterizing Outdoor Faucets Is Crucial

When temperatures drop below freezing, any water trapped in your outdoor faucets or the connecting pipes can freeze and expand, potentially causing pipes to crack or burst. This damage often goes unnoticed until spring when you turn your water back on, resulting in flooding, water damage, and expensive emergency repairs. At Bedrock Plumbing & Drain Cleaning, we see preventable freeze damage every year from homeowners who delayed winterizing or skipped important steps in the process.

Proper winterization not only prevents costly repairs but also extends the life of your plumbing system. Even newer homes with frost-free faucets need proper winterization, as these fixtures are only protected if hoses are disconnected and water can properly drain from the internal pipe.

The Ideal Timing for Winterization

Watch the Weather, Not the Calendar

While mid-October is a good rule of thumb for most areas we serve, the exact timing depends on your local climate. The key is to winterize before the first sustained freeze—when temperatures drop below 32°F for several hours or days. In some years, this might be earlier or later than expected.

For homeowners in the greater metro area, we recommend completing winterization by:

  • Early October for northern suburbs and higher elevations
  • Mid-October for most of the metro area
  • Late October for southern suburbs in milder microclimates

Don’t wait until freezing temperatures are forecasted, as unexpected early freezes can catch you unprepared. Many of our emergency calls come after the first surprise freeze of the season.

Complete Winterization Checklist

Essential Steps for Standard Outdoor Faucets

  1. Disconnect All Hoses: Remove and drain garden hoses, storing them in a garage or shed for winter.
  2. Locate Interior Shut-off Valves: Find the shut-off valves that control water flow to your outdoor faucets. These are typically located in your basement, crawlspace, or utility area near where the pipes exit toward outdoor faucets.
  3. Turn Off Water Supply: Close these shut-off valves completely by turning clockwise until tight.
  4. Drain Remaining Water: Open the outdoor faucet to allow any remaining water to drain out completely.
  5. Leave Faucets Open: Keep the outdoor faucet in the open position throughout winter to prevent pressure buildup if any water does freeze.
  6. Drain the Shut-off Valve: If your interior shut-off valve has a drain cap or bleeder valve, open it to drain water trapped between the shut-off valve and outdoor faucet.

Special Considerations for Frost-Free Faucets

Even frost-free (freeze-proof) faucets require winterization. These fixtures have longer stems that allow the actual water shut-off to occur inside your heated home, but they can still freeze if:

  • A garden hose remains attached, trapping water in the faucet
  • The faucet is installed with an upward slope, preventing proper drainage
  • The faucet has internal damage or worn washers

For frost-free faucets, be sure to:

  1. Disconnect all hoses
  2. Ensure the faucet can drain properly
  3. Consider installing insulated covers for extra protection

Common Mistakes to Avoid

  • Leaving hoses attached: This is the number one cause of damage to frost-free faucets
  • Forgetting interior shut-off valves: Just closing the outside faucet isn’t enough
  • Waiting too long: Don’t risk an early freeze catching you unprepared
  • Assuming new fixtures don’t need winterization: Even modern frost-free faucets require proper winter care

What If You’ve Already Had a Freeze?

If you’ve experienced a light freeze before winterizing, you might still be okay. Turn off the interior shut-off valves and then check for leaks when you open the outdoor faucet. If water continues flowing or you notice leaking when you later turn the supply back on, contact Bedrock Plumbing & Drain Cleaning immediately for inspection.

Professional Assistance

While winterizing outdoor faucets is a straightforward DIY project for most homeowners, our team at Bedrock Plumbing & Drain Cleaning is always available to help. If you:

  • Can’t locate your interior shut-off valves
  • Notice any leaks or damage during winterization
  • Have multiple irrigation systems or specialty outdoor plumbing

Contact us for professional winterization services. Our experienced plumbers can ensure your entire system is properly protected for the winter months ahead.

Don’t let preventable freeze damage ruin your spring. Protect your plumbing system by winterizing your outdoor faucets before the cold sets in. For professional assistance or emergency services, contact Bedrock Plumbing & Drain Cleaning today at [phone number] or visit our website to schedule an appointment.

When Should I Winterize My Outdoor Faucets in Minnesota?

Outdoor faucet during winter

Winterize outdoor faucets by late October or before first hard freeze by shutting off interior valves, draining lines, and installing insulated covers. Irrigation lines in suburbs should be professionally blown out to prevent damage. For Minnesota homeowners, this proactive maintenance is crucial to prevent costly pipe damage from freezing temperatures that typically arrive in early November.

Why Winterizing Outdoor Faucets Is Critical in Minnesota

Minnesota’s frigid winters can wreak havoc on your home’s plumbing system, particularly outdoor faucets and pipes. When water freezes inside these fixtures, it expands with tremendous force – enough to crack pipes, split faucets, and cause thousands of dollars in water damage when things thaw. Taking the time to properly winterize these vulnerable areas isn’t just recommended – it’s essential preventative maintenance for every Minnesota homeowner.

The process is relatively simple, but timing is everything. Wait too long, and you risk frozen pipes before you’ve had a chance to protect them. Winterize too early, and you might find yourself without outdoor water access when you still need it for fall cleanup.

The Ideal Timing for Winterizing in Minnesota

Watch the Forecast, Not the Calendar

While late October is generally a safe target for winterizing outdoor faucets in Minnesota, the weather should be your primary guide. The critical threshold is when overnight temperatures consistently drop to 32°F or below. This typically happens in early November across most of Minnesota, though northern regions may experience freezing temperatures earlier.

Regional Considerations Across Minnesota

  • Twin Cities Metro: Aim for late October to early November
  • Northern Minnesota (Duluth, Bemidji): Mid-October is often necessary
  • Southern Minnesota (Rochester, Mankato): Early November may be safe, but don’t delay

Better Early Than Sorry

If you’re uncertain about timing or planning to be away from home during the fall-to-winter transition, err on the side of caution. Winterizing a week or two early is far preferable to dealing with burst pipes and water damage.

Step-by-Step Winterization Process

1. Shut Off Interior Supply Valves

Most Minnesota homes built in the last few decades have dedicated shut-off valves for outdoor faucets located inside the home, typically in basements or crawl spaces. These valves are your first line of defense:

  • Locate the interior shut-off valve for each outdoor faucet
  • Turn the valve clockwise until fully closed
  • If your valve has a small drain cap, place a bucket underneath and open this cap to drain remaining water

2. Drain the Exterior Faucets

After shutting off interior valves:

  • Go outside and open each outdoor faucet completely
  • Let all water drain out (this may take several minutes)
  • Leave the faucet in the open position throughout winter

3. Install Insulated Faucet Covers

Even after draining, added protection is recommended:

  • Purchase foam insulated faucet covers at any hardware store (typically $5-10 each)
  • Secure them tightly over each outdoor faucet
  • Ensure a snug fit with no gaps where cold air can penetrate

4. Don’t Forget Other Outdoor Water Sources

  • Garden hoses: Disconnect, drain completely, and store indoors
  • Irrigation systems: Professional blowouts are recommended (see below)
  • Pool equipment: Follow manufacturer guidelines for winterization

Special Considerations for Irrigation Systems

If your Minnesota home has an in-ground sprinkler system, winterization is even more critical. Unlike simple outdoor faucets, irrigation systems have extensive underground piping that can be damaged by freezing temperatures.

Professional irrigation blowouts use compressed air to remove all water from these systems. This specialized service typically costs $75-150 depending on system size, but is far less expensive than repairing damaged irrigation lines in spring.

Common Winterization Mistakes to Avoid

  • Waiting too long: Procrastinating until the first freeze forecast often leads to rushed, incomplete winterization
  • Forgetting interior shut-off valves: Simply covering outdoor faucets isn’t sufficient protection
  • Leaving hoses connected: Even with faucets turned off, connected hoses can trap water that freezes and damages faucets
  • Assuming new homes don’t need winterization: Even “frost-free” faucets require proper winterization in Minnesota’s climate

When to Call a Professional

While outdoor faucet winterization is a manageable DIY task for most homeowners, certain situations warrant professional help:

  • Homes without accessible interior shut-off valves
  • Older homes with complex plumbing configurations
  • Properties with specialized outdoor water features
  • When you’re unsure about proper techniques

Let Bedrock Plumbing Protect Your Home This Winter

Don’t risk costly water damage from frozen pipes this winter. If you’re uncertain about properly winterizing your outdoor faucets or irrigation system, Bedrock Plumbing & Drain Cleaning offers comprehensive winterization services throughout the Minnesota area.

Our experienced technicians will ensure your entire plumbing system is properly protected against Minnesota’s harsh winter conditions. Contact us today to schedule your pre-winter plumbing inspection and winterization service. Peace of mind is just a phone call away!

How Do I Winterize My Lake Cabin Plumbing?

Faucet during winter

Winterizing your lake cabin plumbing requires several critical steps to prevent costly freeze damage. Start by shutting off the main water supply and draining all pipes completely, including faucets, toilets, and your water heater. Pour non-toxic antifreeze into all drains, toilet bowls, and tanks after they’ve been emptied. If you have well systems or specialized equipment, ensure these are properly winterized according to manufacturer guidelines.

Why Proper Winterization Is Essential

Minnesota and Wisconsin lake cabin owners know that winter temperatures can plummet well below freezing for extended periods. When water freezes inside pipes, it expands with tremendous force—enough to split copper, PVC, or steel pipes. The damage often remains hidden until spring when you reopen the cabin and suddenly discover burst pipes, damaged fixtures, and potential water damage throughout your property.

Proper winterization isn’t just about preventing inconvenience—it’s about protecting your investment. A single burst pipe can cause thousands in damage, far exceeding the cost of proper winterization. Plus, many insurance policies may not fully cover freeze damage if proper precautions weren’t taken.

Complete Winterization Checklist

1. Shut Off The Main Water Supply

Begin by locating your cabin’s main water shut-off valve. This is typically located where the water line enters your home, often in a basement, crawl space, or utility room. Turn this valve completely off.

If your cabin uses well water, turn off the power to the well pump at your electrical panel. For municipal water supplies, consider contacting the water department to shut off service at the street if you’ll be away for the entire season.

2. Drain All Water From The System

After shutting off the water supply, open all faucets in the cabin (both hot and cold) to begin draining the system. Don’t forget outside spigots and shower heads.

Flush all toilets repeatedly until water no longer fills the tank. Remove any remaining water in the toilet tanks and bowls using a small cup and sponge or wet vacuum.

3. Water Heater Drainage

Turn off your water heater’s power source (electricity or gas). For electric heaters, shut off the appropriate breaker. For gas heaters, turn the gas valve to the “pilot” or “off” position.

Connect a garden hose to the drain valve at the bottom of the water heater and direct it to a floor drain or outside. Open the valve and let all water drain completely. Leave the drain valve open throughout winter.

4. Add Antifreeze Protection

Purchase RV/marine-grade, non-toxic propylene glycol antifreeze specifically designed for plumbing systems. Never use automotive antifreeze, which is highly toxic.

Pour about 1-2 cups of antifreeze down each drain in the cabin (sinks, showers, tubs, floor drains). Pour approximately 1-2 cups into each toilet bowl and tank after removing as much water as possible.

5. Appliance Winterization

For dishwashers, run a brief cycle to remove water from the pump, then add a cup of antifreeze.

For washing machines, set the machine to a brief wash cycle, shut it off once it fills with water, and then drain this water. Add antifreeze to the tub afterward.

Refrigerators with ice makers or water dispensers need special attention—disconnect water lines and blow them out or add antifreeze according to manufacturer guidelines.

6. Special Considerations for Well Systems

If your cabin uses a well, the pump system requires additional attention. After shutting off power to the pump:

  • Drain the pressure tank completely
  • Remove and store any water filters
  • Drain all lines leading to and from the pressure tank
  • Consider adding antifreeze to the jet pump if it’s above the frost line

7. Inspect for Potential Problem Areas

Before leaving, check for any areas where pipes might be exposed to extreme cold, such as:

  • Pipes along exterior walls
  • Plumbing in unheated areas
  • Pipes in crawl spaces or unfinished basements

Consider adding extra insulation in these areas as an additional precaution.

Professional Winterization Services

While many cabin owners can handle basic winterization themselves, professional plumbing services offer several advantages:

  • Complete drainage using specialized equipment
  • Compressed air blowouts for hard-to-reach areas
  • Thorough antifreeze application
  • Professional inspection for potential issues
  • Documentation for insurance purposes
  • Peace of mind knowing experts handled the job

At Bedrock Plumbing & Drain Cleaning, we offer comprehensive lake cabin winterization services throughout Minnesota and western Wisconsin. Our technicians use specialized equipment to ensure complete water removal from all plumbing systems, significantly reducing the risk of freeze damage.

Spring Reopening Considerations

When planning your winterization, also consider spring reopening needs. Proper documentation of your winterization process will make spring activation much smoother. Our professionals can provide detailed instructions for safely reactivating your system when warm weather returns.

Protect Your Investment Today

Don’t risk thousands in damage from frozen pipes this winter. Whether you’re handling winterization yourself or seeking professional assistance, taking action before the first hard freeze is essential. Bedrock Plumbing & Drain Cleaning offers flexible scheduling for cabin winterization services throughout the fall season.

Contact us today at 612-332-6633 to schedule your professional cabin winterization service or to discuss your specific needs. Our experienced technicians will ensure your lake retreat stays protected all winter long.

Can I Use My Plumbing During a Power Outage?

Power outage

During a power outage, you can still use some plumbing fixtures but not others. Gravity-dependent systems like toilets and drains will continue to function normally as long as municipal water pressure remains adequate. However, electrical-dependent systems such as sump pumps, well pumps, and sewage ejector pumps will not work without backup power. Planning ahead with battery backups or generators for these critical systems ensures you’ll maintain essential plumbing functionality when the power goes out.

How Power Outages Affect Your Plumbing

Power outages can be more than just an inconvenience—they can significantly impact your home’s plumbing systems. Understanding which parts of your plumbing will continue to work during an outage can help you prepare appropriately and avoid potential water damage or sanitation issues.

The good news is that many basic plumbing functions don’t require electricity. Municipal water systems typically maintain pressure using gravity and backup generators at treatment facilities, meaning water often continues flowing to homes even during outages. However, systems in your home that rely directly on electricity will stop functioning until power is restored.

What Will Work During a Power Outage

Toilets – Standard gravity-flush toilets will typically continue to work during a power outage, as they rely on water pressure and gravity rather than electricity. You can flush these toilets normally, though it’s wise to conserve water if you’re unsure how long the outage will last.

Faucets and Showers – Cold water will continue to flow from your taps if your home receives municipal water. The water pressure might be lower than normal but should be sufficient for basic needs.

Drains – Drain lines work through gravity and don’t require electricity, so sinks and shower drains should function normally. However, be mindful that if your home has a sewage ejector pump for basement plumbing, those drains won’t work properly.

Water Heater (Limited Use) – If you have a conventional tank-style water heater, you’ll have access to the hot water remaining in the tank. Gas water heaters may continue heating water if they have a pilot light rather than electronic ignition, though modern safety features might still prevent operation.

What Won’t Work Without Power

Sump Pumps – Perhaps the most critical concern during a power outage is your sump pump. Without electricity, your sump pump won’t function, potentially leading to basement flooding during heavy rain.

Well Pumps – If your home relies on well water, you’ll lose water pressure entirely during a power outage since the pump cannot operate.

Pressure-Assist Toilets – Unlike gravity toilets, pressure-assist models rely on electricity to create the pressure needed for flushing.

Sewage Ejector Pumps – Basement bathrooms or other plumbing fixtures below the main sewer line require sewage ejector pumps to push waste upward against gravity. These won’t function without power.

Tankless Water Heaters – These units require electricity to operate their electronic controls and ignition systems, regardless of whether they’re powered by gas or electricity.

Electric Water Heaters – These will stop heating water immediately when power is lost.

Preparing Your Plumbing for Power Outages

Backup Power Solutions

The most effective way to maintain plumbing functionality during a power outage is to install backup power systems:

Battery Backup for Sump Pumps – A battery backup system can keep your sump pump running for several hours during an outage, protecting your basement from potential flooding.

Whole-House Generator – An automatic standby generator can power essential systems including pumps, water heaters, and other plumbing components during extended outages.

Water-Powered Backup Sump Pump – These use municipal water pressure to create suction that removes water from your sump pit without requiring electricity.

Emergency Water Supply

Even with functional plumbing, it’s wise to maintain an emergency water supply:

  • Store at least one gallon of water per person per day for at least three days
  • Keep water stored in clean, food-grade containers
  • Replace stored water every six months
  • Consider installing a whole-house water filter if your municipal water might be compromised during emergencies

What to Do During a Power Outage

  1. Conserve Water – Limit toilet flushing and water usage to extend your supply
  2. Check Your Basement – Monitor your sump pit regularly if you don’t have a backup system
  3. Turn Off Water Heater – If you have an electric water heater, turn it off until power is restored to prevent damage when empty tanks regain power
  4. Avoid Using Basement Plumbing – If you have a sewage ejector pump, avoid using toilets, showers, or sinks below the main sewer line level

Professional Preparation from Bedrock Plumbing

At Bedrock Plumbing & Drain Cleaning, we understand how important functioning plumbing is during emergencies. We offer comprehensive solutions to keep your essential systems running during power outages, including:

  • Professional installation of battery backup systems for sump pumps
  • Whole-house generator connection to critical plumbing systems
  • Preventative maintenance to ensure backup systems work when needed
  • Emergency plumbing services during power outages

Don’t wait for the next power outage to discover vulnerabilities in your home’s plumbing system. Contact Bedrock Plumbing today for a complete assessment of your plumbing’s power outage readiness and learn about our custom solutions to keep your water flowing when the lights go out.

What Should I Do If My Basement Floods?

Flooded floor

If your basement floods, immediately shut off electrical power to the area for safety, then locate and stop the water source if possible. Call emergency plumbing services and water damage restoration specialists right away, while documenting the damage with photos for insurance purposes. Begin removing water and start cleanup within 24-48 hours to prevent mold growth, but avoid pumping out water too quickly as this can damage foundation walls.

Immediate Safety Steps

When faced with a flooded basement, your first priority must be safety. Water and electricity create a deadly combination, so before you even step into the water, locate your electrical panel and shut off power to the affected areas. If you can’t safely reach your electrical panel, contact your utility company for emergency disconnection.

After ensuring electrical safety, stop using plumbing fixtures in your home, including toilets, sinks, and washing machines. Using these while your basement is flooded could worsen the situation by adding more water to the mix.

Finding and Stopping the Water Source

Basement flooding typically comes from one of three sources: internal plumbing failures, external water intrusion, or sewage backups. Each requires a different approach:

  • Plumbing failures: If a pipe has burst or an appliance has failed, locate your main water shut-off valve and turn it off immediately. This valve is typically located where the water main enters your home.
  • External flooding: During heavy rains or groundwater issues, water may enter through foundation cracks, window wells, or poor drainage. In these cases, you may need to wait until rain subsides while focusing on water removal.
  • Sewage backups: These are identifiable by their distinctive odor and require professional handling due to contamination risks. Do not attempt to clean sewage water yourself.

Getting Professional Help

Emergency Plumbing Services

At Bedrock Plumbing & Drain Cleaning, we provide 24/7 emergency services for basement flooding. Professional plumbers can:

  • Accurately identify the water source
  • Make necessary repairs to prevent further flooding
  • Provide guidance on preventative measures for the future

Don’t wait to call—the longer water sits in your basement, the more damage it causes.

Water Damage Restoration

Beyond plumbing repairs, you’ll likely need water damage restoration services. These specialists have industrial-grade water extraction equipment, dehumidifiers, and air movers that can dry your basement much faster than consumer equipment. They also provide:

  • Professional assessment of structural damage
  • Mold prevention treatment
  • Sanitization of affected areas
  • Coordination with your insurance company

Proper Water Removal Techniques

When removing water from your basement, avoid pumping it out too quickly. If groundwater levels outside are high, rapid water removal could create pressure imbalances that might crack or collapse foundation walls.

Instead:

  1. Remove water gradually (about one-third of the water per day)
  2. Use submersible pumps for deep water
  3. Follow with wet/dry vacuums for shallow water
  4. Set up dehumidifiers and fans once standing water is removed

Documentation and Insurance

Before beginning cleanup, thoroughly document the damage:

  • Take photos and videos of all affected areas and items
  • Make detailed notes about damaged possessions
  • Save receipts for any emergency repairs or cleanup supplies

Contact your insurance company as soon as possible. Many homeowner’s policies don’t automatically cover basement flooding, but you may have coverage depending on the flood’s cause and whether you have additional flood insurance.

Cleanup and Sanitization

Begin cleanup within 24-48 hours to prevent mold growth. Wear protective gear including:

  • Waterproof boots
  • Rubber gloves
  • N95 respirator mask (especially if sewage is involved)

Sort items into categories:

  • Salvageable items that can be cleaned and dried
  • Items requiring professional restoration
  • Items that must be discarded

Sanitize all surfaces that contacted flood water using a solution of one cup bleach per gallon of water, or commercial disinfectants designed for flood cleanup.

Preventing Future Flooding

After addressing the immediate emergency, consider these preventative measures:

  • Install a sump pump with battery backup
  • Apply waterproofing sealants to basement walls
  • Improve exterior grading around your foundation
  • Clean gutters regularly and extend downspouts away from your home
  • Consider installing check valves to prevent sewage backups

When to Call Bedrock Plumbing & Drain Cleaning

Don’t face basement flooding alone. Our expert team at Bedrock Plumbing & Drain Cleaning provides fast, reliable emergency service throughout the area. We can identify the source of your basement flooding, make necessary repairs, and help prevent future incidents.

Contact us immediately at the first sign of basement water issues—whether it’s a minor leak or major flooding. The sooner we can address the problem, the less damage your home will sustain. Call our 24/7 emergency line or visit bedrockplumbers.com to schedule service and protect your home from water damage.

How Do I Find a Water Leak in My Home?

Dripping faucet

Detecting a water leak in your home requires a systematic approach. Start by checking your water meter when no water is in use – if the meter continues to run, you likely have a leak. Other signs to look for include water stains, musty odors, unexplained increases in water bills, sounds of running water, unusually warm spots on floors, or visible corrosion on pipes. For hard-to-find leaks, professional plumbers use specialized acoustic and thermal imaging equipment to pinpoint the exact location without invasive measures.

Common Signs of Water Leaks in Your Home

Water leaks can cause significant damage to your property if left undetected. Being aware of the warning signs can help you identify problems early and prevent costly repairs. Here are the most common indicators that you may have a water leak:

Unexpected Increases in Water Bills

A sudden spike in your water bill without a corresponding increase in usage could indicate a hidden leak. Compare your current bill with previous months to identify unusual patterns. Even small leaks can waste hundreds of gallons of water monthly, resulting in noticeably higher bills.

Water Meter Test

Your water meter is one of the most reliable tools for detecting leaks:

  1. Turn off all water-using appliances and fixtures in your home
  2. Locate your water meter and check its reading
  3. Wait 30 minutes without using any water
  4. Check the meter again – if the reading has changed, you likely have a leak
  5. For more precise detection, some meters have a small triangle or flow indicator that moves even with minor leaks

Visible Water Damage

Inspect your walls, ceilings, and floors for signs of water damage, including:

  • Discoloration or water stains
  • Warping or buckling of floors or walls
  • Peeling paint or wallpaper
  • Bubbling or blistering on surfaces
  • Sagging ceilings or soft drywall

Musty Odors and Mold Growth

Persistent dampness from leaks creates ideal conditions for mold and mildew. If you notice musty odors or visible mold growth, particularly in areas that shouldn’t be wet, you may have a hidden leak. Pay special attention to bathrooms, kitchens, and basements where plumbing is concentrated.

Finding Hidden Leaks

Some leaks are less obvious but can still cause significant damage over time. Here’s how to locate those harder-to-find problems:

Listen for Running Water

When your home is quiet, listen for the sound of running water when all fixtures are turned off. Pay particular attention near walls containing plumbing pipes. Dripping or rushing sounds can indicate a leak within walls or under floors.

Check for Warm Spots on Floors

For homes with slab foundations or radiant floor heating, leaks in hot water lines can create unusual warm spots on your floor. Walk barefoot across floors and note any unexpectedly warm areas, which could indicate a hot water leak beneath.

Inspect Fixtures and Appliances

Carefully examine the areas around:

  • Toilets (look for water around the base or perform a dye test by adding food coloring to the tank)
  • Sinks and faucets (check under cabinets for moisture or corrosion)
  • Washing machine connections and hoses
  • Water heater (look for pooling water or corrosion)
  • Dishwasher (check for water on the floor after cycles)

Examine Exterior Walls and Foundation

Walk around your home’s perimeter looking for:

  • Unusually lush or green patches of grass
  • Pooling water when it hasn’t rained
  • Cracks in the foundation with water seepage
  • Algae or moss growth on walls

Professional Leak Detection Methods

When DIY methods fail to locate the source of a leak, it’s time to call professionals like Bedrock Plumbing & Drain Cleaning. We use specialized equipment to find leaks with minimal disruption:

Acoustic Leak Detection

Professional plumbers use sensitive listening devices to detect the sound of water escaping from pipes, even when it’s inaudible to human ears. This technology can pinpoint leaks behind walls, under floors, or in your yard without destructive investigation.

Thermal Imaging Cameras

These sophisticated cameras detect temperature differences that could indicate the presence of water. Leaking areas often appear cooler (for cold water pipes) or warmer (for hot water pipes) than surrounding materials, making them visible on thermal scans.

Video Pipe Inspection

For suspected leaks within drainage or sewer pipes, plumbers can insert small cameras to visually inspect the interior of your plumbing system, identifying cracks, corrosion, or other damage that might be causing leaks.

Preventing Future Leaks

Once you’ve addressed existing leaks, take these preventative measures:

  • Schedule regular plumbing maintenance inspections
  • Monitor water pressure (excessive pressure can strain pipes)
  • Replace older appliance hoses with stainless steel braided versions
  • Insulate pipes in unheated areas to prevent freezing and bursting
  • Know the location of your main water shut-off valve

When to Call Bedrock Plumbing & Drain Cleaning

If you’ve discovered signs of a water leak in your North Carolina home, don’t wait for the problem to worsen. Our experienced technicians at Bedrock Plumbing & Drain Cleaning have the expertise and equipment to quickly locate and repair leaks, preventing costly water damage.

Contact us today at (704) 593-4512 for prompt, professional leak detection and repair services. Remember, addressing leaks early not only saves water but also protects your home from structural damage and mold issues.